Fresh Black Kale Chips

Hello everyone! I know it’s been months since I last uploaded a recipe, but trust me it’s been busy! I am back in school!! I decided to study English in Groningen (NL) and it has become pretty difficult to keep up with my cooking. Since I have to travel every day for school, I find myself having little time to dedicate to the blog. I still try cooking new and fresh recipes, but trust me time is nowhere to be found! I promise to upload soon some good old Greek recipes, such as the famous moussaka, since everyone I know asks my recipe! It’s coming soon 😀

kale chips-16
But for now I have for you a super easy and healthy recipe! Ever thought of baking your own kale chips? Well, this is the time for you to try! Kale has been the “it” food in the blogosphere for the last couple of years and it took me a while since I discovered its great taste! In the garden I worked for the last year we had plenty of black kale, famous for stimulating the immune system, being low in calories and full of vitamin C, folic acid, calcium and potassium. So since we harvest plenty of it, I decided to try to bake kale chips! It was delicious!

kale chips-14
For fresh black kale search your local market or your supermarket. If you grow it yourself (like we did), you will have to clean it really good and keep only the soft, curly part of every stem. Cut out the hard part (also for every recipe with kale), since it is not eatable and will make your chips chewy.

kale chips-21
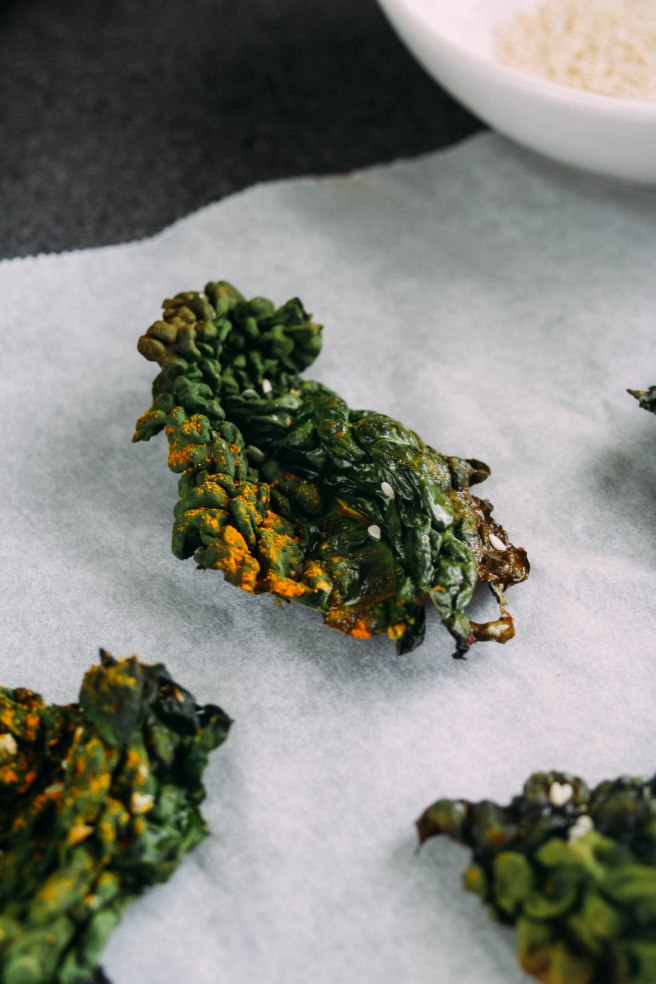
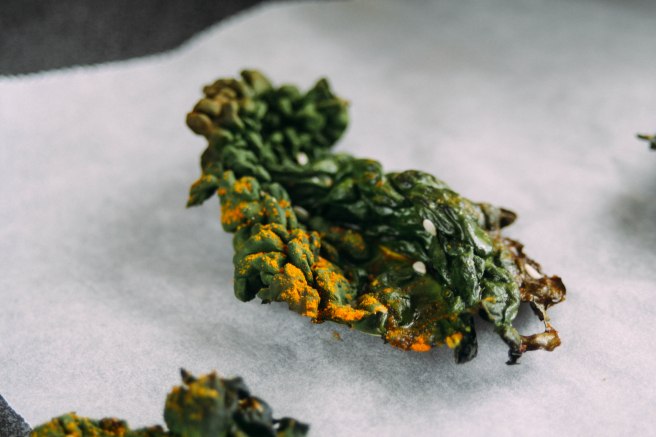
After baking the kale leaves, they will be crunchy enough like chips! And you can eat them as a snack or serve them as a healthy substitute for typical potato chips. If you try this recipe, let me know what you think in the comments below. 😀
Prep. Time: 10 mins, Cooking Time: 10-15 mins, Total Time: 25 mins, Yields 7-8 pieces.

Ingredients
A handful of black kale leaves (I used 7-8 big leaves)
½ teaspoon of turmeric powder
1 tablespoon pepita seeds
1 tablespoon sesame seeds
1 tablespoon of sesame oil
Sea salt
Fresh ground pepper

kale chips-17

Method
Clean your leaves thoroughly. Cut out the soft part of every leaf, keeping out the long, hard stems. Check out this useful video in order to save time and effort. I chose not to cut them smaller, but keep them big and chunky! If you find them too big, cut them in smaller pieces.
Line some parchment paper in a square baking pan. Add the kale leaves and sprinkle with turmeric, pepita seeds, sesame seeds and some sesame oil for extra taste.
Add some sea salt and black pepper.
Bake in the oven for about 15 minutes in 180 °C. Check regularly since they might be ready earlier.
Enjoy!

kale chips-12

Grilled Polenta Rounds with Roasted Red Pepper Spread

This is my first decent attempt to cook something with polenta. I remember back in university I tried to cook it but turned out disastrous. After that I was terrified cooking it again. A while ago I stumbled upon this recipe of the blog Blogging over Thyme and I was super excited to try it. I changed it slightly and decided to challenge myself even more; to cook the polenta rounds from scratch. And trust me it is not as much work as it looks! It is fresh and super tasty, but also suitable for parties. If you try this recipe, please let me know at the comments below.

polenta yo

Prep time: 10 minutes, Cooking time: 30 minutes, Total time: 1 hour, Yields 8-10 servings

Ingredients
for the red pepper spread:
3 large red bell peppers
1/4 cup extra virgin olive oil
6-8 cloves of roasted garlic, roughly chopped
100gr feta cheese, crumbled
Some fresh thyme + more for garnishing
sea salt
freshly ground black pepper

for the polenta:
250gr of polenta
1, 1 liter of water
extra virgin olive oil for brushing
sea salt

Polenta rounds-9   Polenta rounds-25   Polenta rounds-22

Method
Preparation of pepper spread: Preheat your oven at 180°C . Place the peppers in a roasting pan and allow them to soften completely on all sides for about 15 minutes. Remember to rotate them every couple minutes.

Transfer the peppers into a bowl and allow to cool until they are comfortable to touch. Remove the stems, seeds and skin. Slice the peppers into thick slices and place them in a large bowl with the olive oil, roasted garlic and thyme. Allow this mixture to marinate for 20 minutes while you prepare the polenta rounds.

Polenta rounds-8

Preparation of polenta: You want the polenta to be firm, so boil 1, 1 liter of water in a pan adding a ¾ teaspoon of sea salt. Boil the polenta in low heat for about 10 minutes stirring constantly. After it has boiled, transfer it in a shallow dish lined with plastic foil, letting it cool completely. After it has cooled off, take a small glass/cup and make round shapes.

Polenta rounds-5

Brush both sides of the polenta rounds with olive oil. Heat a large grill pan over medium-high heat. Grill the polenta rounds for about 3-4 minutes on each side, flipping them carefully with a spatula. Remove the polenta rounds, placing them on a platter and sprinkling them with some sea salt. Let them cool slightly while you finish preparing the pepper spread.

Remove the strips of roasted red pepper from the oil, allowing most of the oil to drip off. Place the strips in a small food processor and pulse them until they are roughly chopped. Transfer to a medium bowl, add the roughly chopped garlic cloves, and add in the crumbled feta. Sprinkle for more taste with salt and pepper.

Take each piece of grilled polenta and add a large spoonful of pepper spread. Garnish with fresh thyme leaves. Serve immediately.

Enjoy!

Polenta rounds-35 Polenta rounds-39

Mushroom Thyme Crostini

Perfect Christmas appetizer for your guests. It is guaranteed to keep everyone happy and satisfied till the main dish comes. Also perfect for a friends night 🙂 Use fresh and good quality mushrooms, along with the best baguette you can find. Alternatively, you can put the bread in the oven and bake it, but grilling is faster and for me always tastier. You control your bread more and you save enough time so you can also enjoy the evening!


Crostini-16

Equipment: grill pan, frying pan

Prep. Time:30 min, Serves up to 10 people

Ingredients
1 white baguette cut in thin slices
400gr white mushrooms
1 red onion
3 cloves of garlic
3 tbsp olive oil
salt
ground black pepper
fresh thyme Crostini-18 Crostini-15     Crostini-13     Crostini-19

Method
Take a frying pan and set in medium heat with 1 tbsp olive oil. Cut the onion in the smallest pieces you can and put them in the pan. Let them take their juice out for about 4 min. Cut the mushrooms is small pieces and add them in the pan. Stir well and let them fry for about 7 to 8 min.

When the mushrooms have decreased in size, season them with salt, pepper and some fresh thyme. Leave them for about 2 more minutes cooking and then set aside.

Take a grill pan – or you can also put them in the oven for about 15 min – and set in medium heat. Spray the baguette slices – or brush them – with the rest of the olive oil (2tbsp), sprinkle with salt and pepper and set them on the grill pan. Grill each side till golden brown, approximately 5 min.

Set the crostini on a wooden platter and add on top 1 tbsp of the mushrooms. Sprinkle with some extra fresh thyme. Serve freely to your guests! A bottle of Cabernet Sauvignon and the night is yours 😀

Crostini-12    Crostini-10    Crostini-8    Crostini-7    Crostini-6    Crostini Crostini-2

Grilled Halloumi Beetroot Sandwich

After our late summer visit in Cyprus past October for an amazing wedding of a dear friend of ours, we came back with suitcases full of traditional delicacies! One of them was the halloumi cheese (of course)! It is a semi-hard cheese made from goat and sheep’s milk and has a high melting point which means only one thing; it can be fried and grilled maintaining its juiciness and unique taste. So this sandwich seemed a perfect chance to enjoy the taste of this amazing cheese. I chose to accompany it with boiled beetroot and arugula salad, but the ingredient that intensifies all tastes and waters your mouth is the extra garlic. You just cut in half and rub it on the bread! So simple, but trust me, it makes a huge difference.

Grilled Hallumi Beetroot Sandwich-15 Grilled Hallumi Beetroot Sandwich-12

I always keep some boiled beetroot salad in my fridge, accompanied with olive oil, pepper and garlic, but this time I let it plain and added it in pure form without any extra spices. And the result is very rewarding! Beetroot and garlic are known to be best friends. Put in the halloumi cheese and you get an amazing combo. The yogurt and the salad add to this sandwich a sense of freshness and prevent it from being dry in taste. Try this recipe and let me know what you think on the comments below. I would love to hear for more ideas or your own combinations for the perfect sandwich!


Grilled Hallumi Beetroot Sandwich-16    Grilled Hallumi Beetroot Sandwich-4 Grilled Hallumi Beetroot Sandwich-3    Grilled Hallumi Beetroot Sandwich-8 Grilled Hallumi Beetroot Sandwich-6    42-7

Ingredients
1 medium beetroot boiled
4 slices halloumi cheese
2 slices of whole-wheat bread
½ tbsp butter
1 tbsp Greek yogurt & more for the side
1 clove garlic
some arugula salad
salt
pepper

Grilled Hallumi Beetroot Sandwich-14    Grilled Hallumi Beetroot Sandwich-11Grilled Hallumi Beetroot Sandwich-10    Grilled Hallumi Beetroot Sandwich-9Grilled Hallumi Beetroot Sandwich-18

Method
Cut the halloumi in 1cm slices. Prepare a grill pan on medium-low heat and when it is warm enough put it the halloumi slices. Grill each side for approximately 2-3 minutes till golden brown. Grill more if needed.

Prepare the bread by spreading the butter on each side. Grill for about 2 minutes each side till crispy. Cut the garlic clove in the middle and rub it to the warm bread. The garlic will give an amazing light flavor to the bread that fits perfectly with the beetroot.

Cut the beetroot in slices of 1cm after you have boiled and peeled it. Set one slice of bread on a plate and add the halloumi and beetroot slices. Add the salad along with some salt and pepper. Spread with the Greek yogurt the other slice and put it on top. Cut in half and enjoy with some extra yogurt on the side!

Grilled Hallumi Beetroot Sandwich-20    Grilled Hallumi Beetroot Sandwich-22 Grilled Hallumi Beetroot Sandwich-24    Grilled Hallumi Beetroot Sandwich-17

Smokey Beetroot Hummus

When I buy beets, I usually just boil them and serve them with garlic, lemon juice and olive oil as a side salad, all year round. I never actually thought of roasting them, maybe because my Greek mother never thought about it either and when it comes to food, most of the knowledge and tips I got from her!

So, I came across this great recipe on Pinterest (the food blogger’s heaven) and I thought I should give it a try. So thank you a lot The Year In Food blog for the great inspiration. Instead of pistachios I used roasted pine nuts (I always keep a handful of them in a jar so that I can easily use them when needed!) and dried dill.


Serves 4 to 6 persons. Time needed: 60 min for the beets, 10 min for the hummus

45 Beet-4

Ingredients
3 medium beets
1 can chickpeas, rinsed and drained
The juice of 1 lemon
2 tbsp tahini
4 cloves garlic (you can add less, I like it spicy!) pressed or minced
1/2 teaspoon smoked paprika
1/4 teaspoon chili flakes (I use the Greek version which is lighter, bukovo)
sea salt depending on desirable result

1/4 cup roasted pine nuts
2 tablespoons chopped dill or 3 tbsp dried
Fresh white bread for serving

45 Beet-6

45 Beet-5

Instructions
Preheat your oven and rinse the beets. Pierce them a few times with a fork (great tip), place them in a greased baking dish and cover with aluminum foil. Roast them for about 50 min (top 60 if you see they are not soft enough yet) and set them aside to cool.

In a food processor add the chickpeas, lemon juice, tahini, pressed garlic, paprika and chili flakes. Wait until the beets are cool enough, peel them and then combine all ingredients together. Add how much sea salt you think is necessary. Some like it salty, some not.

Puree until it becomes smooth and easy to spread. Add a tablespoon or two of olive oil if you would like to thin its texture.

Serve it in a bowl, garnished with the roasted pine nuts and the dill.

45 Beet-2

Spicy Pumpkin Soup

We have officially entered the cold November and what fits the most in a cold, dark evening, than a warm and delicious pumpkin soup? October and November is the best season to cook pumpkin and explore the numerous possibilities it offers. This recipe has as its base the spice mixture ras el hanout, which comes from North Africa. The name is Arabic and it actually refers to the best spices one can sell. The combinations may vary depending on the region, but spices such as cinnamon, ground chili peppers, cumin, coriander, paprika, turmeric and cardamom are mostly the base of the mixture. Ras el hanout is widely used with meat and rice, but here it has the role to give our pumpkin soup the unique spicy taste we want in order to keep us warm the cold November nights!


Serves up to 4 people. Time needed: 45 min

Creamy Pumpkin Soup-3

Ingredients
400gr pumpkin cut in blocks
2 onions cut in small pieces
3-4 garlic cloves smashed and cut in pieces
1 red pepper
3, 5 vegetable stock cubes
400ml coconut milk
2 tbsp sesame oil
olive oil
black ground pepper
1 tbsp ras el hanout spice mix
1 baguette

soup

Instructions
Heat the olive oil on a soup pan and fry a bit the onion and the garlic with the ras el hanout spice mix for about 2 min.

Add then the pumpkin and the paprika in and cook them for about 15 min. Add the vegetable stock for extra taste along with 1 liter of water. Cook the soup for about 15 min or until everything is soft enough.

Use a blender to smooth the soup until it is pureed. Now it is time for the delicious coconut milk. Stir it for about a minute and sprinkle with some sesame oil and fresh black pepper on top.

Serve with a fresh baguette on the side. Enjoy this delicious spicy pumpkin soup!

*I have served it with some couscous on the side with feta, rocket salad and brown lentil!

Creamy Pumpkin Soup-4

Creamy Pumpkin Soup-5

Traditional gazpacho soup + Nachos dish

Gazpacho soup is originating in Andalusia and is widely eaten in Spain and Portugal on hot days, mostly in the summer. It is also sooo refreshing in the morning or when you feel hungry and don’t want to start eating unhealthy food. Make sure you only use the freshest, highest quality ingredients for this soup. But gazpacho is not only a fresh side dish. It can actually be combined with your favorite snack! You can use the soup for a nice Nacho dish when you have guests or just as a side savory dish for the drinks on a Friday night. What do you say?


Serves up to 8 people, Time needed: 15 min
Ingredients
for the gazpacho
6 ripe tomatoes, peeled and chopped
1 purple onion, finely chopped
1 cucumber, peeled, seeded, chopped
1 sweet red bell pepper seeded and chopped
1-2 tbsp chopped fresh parsley
1 clove garlic, minced
1/4 cup red wine vinegar
1/4 cup olive oil
2 Tbsp freshly squeezed lemon juice
Salt and fresh ground pepper to taste

Processed with VSCOcam with f2 preset
for the Nachos dish
300gr Nacho chips
Some Pecorino Romano for on top
pepper
fresh basil on top

nachos!

Instructions
Combine all ingredients. Blend slightly, to desired consistency. Place in non-metal, non-reactive storage container, cover tightly and refrigerate overnight, allowing flavors to blend.

Put your Nachos on a plate and add the gazpacho, along with the Pecorino Romano, pepper and basil. You can either eat it cold or warm it up a bit in the microwave.

Enjoy!

nachos!-2

Peach tarts with goat cheese

Bet of today: you are going to love this and make it in any chance you get! If not, feel free to drop some lines in this post. But I know that you will fall in love with this recipe, as I did. I have to be honest. I am not a big fan of combining sweet and salty – probably because of my heavy Greek cooking background – but I love challenges and trying new things, especially if we are talking about food! So, before the summer ends, grab some fresh peaches from your local market, pastry, goat cheese and honey and there you have a great treat! You can eat it by itself or even better serve it at a party along with some more delicious small dishes!


Ingredients
400 gr frozen puff pastry, thawed
400 gr ripe, sweet peaches, pitted and cut into ½ inch wedges
100 gr goat cheese, softened
2 tablespoons honey
freshly ground black pepper

Processed with VSCOcam with f2 preset

Instructions
Preheat oven to 200 C. Line a baking sheet with bake paper. Cut pastry into six 10 cm squares (look at picture) and place on prepared baking sheet. Prick each square all over with a fork. Spread each square with a spoonful of goat cheese leaving a 2 cm border. Top each square with peaches. Season with a few grinds of black pepper. Bake for 20 to 25 minutes, rotating the pan halfway through, or until the pastry is puffed and golden and the peaches are soft. Drizzle with honey just before serving.

Enjoy!

(recipe inspired by Pinterest)

Eggplant with feta (oven dish)

Summerish and easy, this recipe can also be served as a “meze” (greek tapas) accompanying the Ouzo and the Tsipouro (Greek traditional drinks), along with some smoked mackerel and extra feta on the side. Eggplants are widely used in the Greek cuisine and are known for the long time they need to be cooked, but do not worry! Once it is in the oven, let it do its magic! You do have to check it once in a while, but nothing more than that. So don’t be afraid of it!


Ingredients

2 big eggplants
1 big onion and/or 2 scallions
3-4 garlic cloves
1 tomato
1 can tomato juice (or as much as it takes)
200 gr feta
olive oil
pepper
salt
fresh parsley

Processed with VSCOcam with f2 preset

Procedure

Wash and cut the eggplants in cubes, sprinkle them with olive oil and salt, so that they will not turn black. Put them in a baking pan for 20 minutes in the oven to be soft. As soon as the eggplants are softer, cut the onion and the garlic and toss them inside the pan.

Cut the tomato and toss it in along with the olive oil and the spices. Thrown in the tomato juice but do not overflow it. Just enough to give it some liquids and not letting it be completely dry. Add some water and put it in the over for 40-50 minutes until all the ingredients are mingled in and soft.

It is good to check it often so that you see how the eggplants are. Are they too soft, take it out if you don’t like it. Are they a bit crunchy, give them some extra time.

The last 10 minutes of the cooking, add the feta on top so that it will have time to be warm and a bit soft. Don’t leave it more than 10 minutes, because it can burn. Feta is not like other cheeses, it doesn’t really melt, it gets softer and after that black!

Enjoy!

Butternut squash purée

This dish is a warm mixture of tastes that traditionally you will not see in any typical Greek dish. The sage leaves with the butternut squash match so perfect in this oven dish, that you will be amazed, not to mention the simplicity of it. The hard squash transforms into a tender vibrant orange color mash that can be served as a side dish to any type of meat or just stand by itself on the table.

Ingredients

1 small to medium butternut squash

1 tbsp butter, melted

60gr crème fraiche

70gr grated Parmesan cheese

4 or 5 fresh sage leaves

Salt and pepper


Procedure

Preheat oven to 200 degrees.

Slice butternut squash in half and take out seeds. Rub the insides with melted butter; season with salt and pepper.

Lay the squash halves cut-side down on a baking sheet. Throw a few sage leaves under each squash cavity and place in the oven.

Roast the squash until very soft and fork tender, 35 to 40 minutes. Remove from the oven and set aside until cool enough to handle.

Take out the flesh from the squash halves and place in food processor. Purée with the crème fraiche and half of the Parmesan cheese until silky smooth. Add more salt and pepper if needed.

Fill a glass pyrex with mixture. Sprinkle the rest of the Parmesan and some more sage leaves and bake until golden brown, about 15 minutes.IMG_4836IMG_4845

Serve warm!